Tuesday, September 13, 2016

Pomegranate Chicken - Sticky Sweet Anachronism

Pomegranate is a popular ingredient in medieval cooking. I have seen multiple sources for it used in sauces mainly - particularly served with fowl or pork. I personally had never used it in cooking, but came across pomegranate syrup and a lot of chicken (I'll explain) - so there really was only one option.

I was given the task to cook a small lunch for staff at the East Kingdom's Equestrian Tourney this year. With a lunch attendance projected at 20-30 people this was not a difficult meal to plan. It was expected to be hot so hydration and protein were important.

Chicken always goes over well, and it's relatively cheap so it was the primary protein I went with. I had also obtained a bottle of Pomegranate Syrup with the most basic of ingredients (sugar, water, pomegranate juice). I knew it'd be too sweet on it's own, but with a little doctoring it could be quite delicious.

Instead of finding a period recipe, I decided to just go with flavors and items that were (fairly) common. I chose to pair the syrup with murri (soy sauce), garlic, parsley, and rosemary. Albeit rosemary isn't too wildly documented to be used in food - it was used in wedding ceremonies during the middle ages. I'd like to think a curious cook might've given a taste one day and thought it a good idea to add to a dish.

The chicken before it was put in the fridge overnight.
I took chicken wings, and first baked them in a baking tray for about 45 minutes at 350 to let them cook through. While they did, I combined the components of the sauce. I did this by taste, until the pomegranate didn't feel like I'd get a toothache from eating the chicken.

I would gradually add the other ingredients a tablespoon at a time until I felt it was more palatable as a whole. It took a lot of adding tiny amounts of secondary ingredients until it was just right. Once that happened, I let the sauce sit until the chicken was done cooking.

Once the chicken was done, I let it cool for about 15 minutes, and then placed it in an aluminum baking tray (this makes for very easy reheating and clean up on event day). I then poured my sauce mixture over the chicken and let it sit overnight in the fridge.

Getting these ready during event day was simple. I merely had to put them on the camp stove burner and let them heat up. I kept them at low heat for a couple hours. This keeps them tender and again - easy peasy.

The full spread with the chicken front and center.
When they were done, they got plated and put in the "dining hall". It was a small lunch but enough to sustain the staff at the event. The menu in it's entirety was as follows:

Pomegranate Chicken
Garlic Mushrooms
Pickled Carrots
Stuffed Grape Leaves
Assorted Flavored Butters
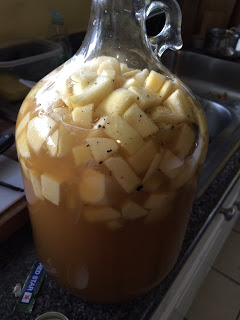
Sliced Apples
Bread
Cheese


If you're interested in the recipe - Please see below and thank you for stopping by!


Lady Elvira's Pomegranate Chicken

12 lbs of Frozen Chicken Wings

Sauce:

750 ml of Pomegranate Syrup
4 Sprigs of Rosemary
4 Tablespoons of Minced Garlic
2 cups of Parsley
1/2 c of Soy Sauce

Bake the chicken in the oven as directed on the package.

While the chicken is cooking, combine the sauce ingredients and set aside.

Once the chicken is cooked, let it cool for 10-15 minutes.

Place your chicken in a container of your choice (I used an aluminum pan) and add the sauce.

Let it refrigerate overnight.

Cook on low heat for a few hours, moving chicken regularly to get even flavor distribution.

Once the chicken looks caramelized, it's ready to plate.

Eat and Enjoy!

Tuesday, April 19, 2016

Quite a Pickle We're in: Radish Edition

A person walks into the doctor's office. 

A banana stuck in one of their ears, a radish in the other ear, and a carrot stuck in one nostril. 

The person says, "Doc, this is terrible. What's wrong with me?" 

The doctor says, "Well, first of all, you need to eat more sensibly." 

Radishes are far from everyone's favorite vegetable. They're bitter, tough, and not pleasing to many palettes. I'm personally a lover of radishes in most any form. One form I had never tried before was pickling. I love pickles. I love radishes. What better way to enjoy my two favorite things than by joining them together?

Both pickling and radishes date back quite a bit so this is all prospectively period (other than keeping it in a mason jar, of course). Radishes are documented back during the Roman Empire and were said to have come in a variety of tastes, sizes, and colors - much like they are today. Pickles were believed to be made by Mesopotamians in 2400B.C. - and thus a very period, and pioneer food discovery.

It only takes 24 hours for radishes to pickle. So cut them up on a Friday afternoon, and they're ready by the time you have lunch at that camping event on Saturday.

I cheated a little and used pickling spices in this mixture. My next attempt will utilize something a little less easy, but I'm sure they'll still be easy to make nonetheless.

I started with a 32 oz mason jar and filled it with thinly sliced radishes. Every few radishes I placed a smashed clove of garlic, and at the end I topped it all of with white vinegar and pickling spices. That was it. There is indeed a recipe below for your use. I'll also have an upcoming post as well regarding a variation of this same recipe. It's something easier to document ingredients for and seems it might be even tastier, and more period.

Elvira's Pickled Radishes


1 32 oz. Mason Jar
2 Bundles of Radishes
3 Large cloves of Garlic
Handful of Pickling Spice *
Vinegar to Fill

Slice your radishes thinly and place in the mason jar.
Every in to 2 inches place a smash garlic clove in the jar.

Once full, place your pickling spice in the jar.
Fill with vinegar.
Let sit for 12-24 hours.


Viola!


Monday, April 18, 2016

Cheesiest Post Ever - Homemade Farmer's Cheese

Can you see why I needed to make this?
It's even more delicious in person...
There's an SCA event coming up and I wanted to go a little outside of my comfort zone for meal planning. There's a slot of time that I, and three other friends will cook a small "second breakfast" sort of meal and I just wanted to kick it up a notch. Farmer's Cheese was my idea. I had never made cheese before, and didn't know how easy it could be!

Who doesn't love cheese (other than folks that are allergic, of course)? Cheese has been around for over 4,000 years and I've always wanted to try making my own. This event seemed like the perfect opportunity. First, I had to test it though.

It's only takes three main ingredients, and a few commonly found items in your kitchen.

1/2 gallon of whole milk

1/8 cup of vinegar

 A dash of Salt

Those are all the ingredients you need. That's it!


You materials should be the following:

Large stock pot (big enough to fit a half gallon / whole gallon of milk in)

A colander

Cheesecloth
A large spoon for stirring, and scooping
Large bowl for colander (to reserve whey) - Optional

To bring all these together to make yourself some delicious cheese... follow these steps.

Place your milk (either half gallon at a time, or all at once depending on your pot size) in your pan, and turn it to medium heat. You don't want to scald your milk, but you do want to bring it up to temperature.

Some folks like to use a thermometer when making cheese, but I don't think your run of the mill Kitchener in the middle ages had one.. so I didn't use one either.

You'll want to stir this pretty continuously while the milk heats up. A large slotted spoon or ladle works best for this.

Keep this up until your milk just starts to steam and simmer. You don't want it to get to a rolling boil, but it should be steaming a good amount and bubbles should start coming to the top on the sides of your pan.

Once this happens, add your vinegar! Your milk will immediately start to separate. Make sure to stir as it does this, so that you get all that vinegar throughout your milk.

Once lumps (soon to be cheese) start to form, scoop them into your lined colander and let them drain. It only takes a few minutes, and you can gently squeeze it to urge it along. You can place your colander in a clean sink, or in a large bowl to reserve some of that whey! Whey can be used to make a lot of things, so it could't hurt.

Once your cheese has drained, place it in a storage container and add salt. You can also add whatever spices you prefer as well! I tried a small batch with herbs and garlic - it was divine. I'm not sure how long it keeps, I just made it yesterday afternoon. I you like what I've posted here, let me know and I'll be happy to follow up with other techniques and flavors! Thanks again for reading.
Completed cheese - Ready for eating! 


Thursday, April 14, 2016

Mead!: The Adventure Continues

So back in November I posted about our first attempt at making mead. It was a traditional sack mead with a lot of honey and apples. I added some vanilla too which certainly came through during our recent tasting!

Now, when we did our tasting recently we had more than just our sack mead. We had actually done an additional five flavors shortly after the first! Of course we have our ingredients for each one, and wanted to get opinions on flavors before sharing the findings of each.

From left: Sack Mead / First Born, Pear Hydromel,
Golden Delicious w/ Wildflower Honey, Raspberry w/ Turkish Honey,
Pear Hydromel w/ Cacao Nibs, and Golden Delicious w/ Blueberry
 We really wanted to take the opportunity to try multiple flavor pairings and just go from there. We thought about what would taste best together and we were both pretty happy with the results. As were our lovely friends who helped give invaluable feedback.

The one thing that all the recipes we created have in common is that they were all brewed using a white wine yeast, a Cote de Blanc. Our next few attempts will be done with different yeasts and ingredients. Each batch was done in a one gallon carboy, and wielded two 32oz bottles and a one or two smaller "test" bottles. The test bottles from each were what we used for the tasting.

We started with our Hydromels. We had two, the simple Pear Hydromel, and the Pear Hydromel with Cacao Nibs. Even that one ingredient made all the difference between the two.
Pear Hydromel w/ Cacao Nibs

We started with the simple pear hydromel. What gave it the "watered down" quality of a hydromel was making pear juice instead of putting cut, raw pear in it. We then blended that pear juice with our honey.

Once that was done fermenting, we bottled two different batches to build different flavor profiles. One batch was done with cacao nibs, and the other with hops (not shown).

The Pear Hydromel with Cacao had beautiful clarifying on it. We were both really pleased with the color. It had a dry flavor and, as Hydromels tend to go it was incredibly light. There were also slight, very mellow after tastes of chocolate. A nice surprise. I certainly wasn't expecting to get that much of a hint of it.

 Anjou Pear Hydromel
The Anjou Pear Hydromel had no mellow after notes to it. It had a nice, light flavor of a dry white wine without the chocolate. It lended itself a more tart aftertaste than the cacao version, but was just as enjoyable. I made the suggestion of using it in a sangria. Even if sangria isn't your thing, with both of these hydromels they should definitely be enjoyed chilled. Neither seemed to need much more aging, and were quite lovely being so new.

Next up were our two Golden Delicious flavors. We had a simple golden delicious apple with vanilla; and we had a blueberry version. Both were also made with a local wildflower honey. Both of these were melomels and didn't involve us making our own apple juice. That'll be an upcoming attempt when apple season comes around.

The Golden Delicious w/ Vanilla
The golden delicious had a golden opaque color. Not as successful clarifying as our melomels, but for obvious reasons. These were done with small bits of apple instead of a sifted juice. Still a lovely color nonetheless. The aroma was very sweet, as was the initial flavor. There were certainly some tart notes after the fact with a noticeable alcohol flavor at the back of the throat. Nothing too intense, but just enough to remind you you're drinking.

The Golden Delicious w/ Blueberry
The blueberry version was a little different. Still our same base of wildflower honey, golden delicious apples, and vanilla - but this mixture included blueberry syrup and a dash of orange blossom water.

The aroma was very sweet with this one. The clarity was a little higher as well. Possibly because of the additional re-rack to separate them for the different batches. It had dry, fruity notes with no alcoholic aftertaste. My second favorite flavor of all six.

My absolute favorite among all six was the Raspberry with Turkish Honey. Firstly, turkish honey has a gorgeous golden color. That was the first thing that drew me to it. I also love raspberries. There was only one solution here, and that solution was mead. I added some cinnamon to it as well for a little something extra.
The Raspberry and Turkish Honey

The color was stunning from the get go. The combination of bright honey and bright fruit made for a very colorful mead. Slightly cloudy, since raspberries can be very pulpy. Next time some extra filtration might not be such a bad idea. The flavors were perfect (at least to me). A noticeable alcohol aroma, but not too overpowering. The flavor of alcohol was much less intense than the smell. The flavor was sweet with a smooth finish. This one I'm going to let age until Pennsic and enjoy it then.

Oddly enough, our "First Born" mead was my least favorite of all of
Sack Mead "First Born"
them. It was much much sweeter than I personally prefer, but the feedback we got on it was much more forgiving than I had anticipated. Since it was so overly sweet, it was suggested to use it more like a flavored syrup for foods and other drinks. That seemed like the best option to me, personally and depending on how it works in cooking we'll be brewing more and more of it. I think I'll be attempting a chicken recipe with it during an upcoming camping event.

If you happen to find me at an SCA event this summer, please stop me and talk brewing with me! This is a very new venture and I really would like to pick as many brains as possible. I'll also do my best to carry around something to share, but I'm limited on what I have in stock right now. I'll share it if I've got it, though. I look forward to making more and sharing them all! Thanks for reading, and if you do end up trying my mead let me know what you think!

YIS

Lady Elvira Violante Ballesteros


Monday, November 23, 2015

Mead! The Adventure Begins...

Mead has had a long history alongside men during their stay on Earth. It has fantastical stories where it's held in the highest regard among kings and gods.It was once said by Vikings that the mead made from the blood of a god, and honey would turn a man  into a scholar.

Mead, or honey-wine is still a beverage that graces tables to this day.It may not hold as high a covetous repertoire, but still is enjoyed by many.

The earliest surviving description of mead is in the hymns of the Rigveda, a sacred book of Hinduism.
In Ancient Greece, mead was said to be the preferred drink. Aristotle discussed mead in his Meteorologica and elsewhere. The Spanish-Roman naturalist Columella gave a recipe for mead in De re rustica, about AD 60.

"Take rainwater kept for several years, and mix a sextarius* of this water with a pound] of honey. For a weaker mead, mix a sextarius of water with nine ounces of honey. The whole is exposed to the sun for 40 days, and then left on a shelf near the fire. If you have no rain water, then boil spring water."
*- A sextarius is the equivalent to one pint.

What sort of re-enactor would I be if I didn't try my hand at mead at least once? Not to say everyone should try it, but I like medieval food... and I dare say.. LOVE mead and beer. So I asked the help of a friend who had experience, and told me what I'd need.

3 - 5 lbs of honey
1 gallon carboy
1 airlock
1 package of yeast ( I got a champagne yeast)
Water

I had everything I needed... now I just needed to put it all together. Admittedly it took much longer to get everything assembled than originally planned, but it's now fermenting away in a friend's closet.

So we dissolved the honey with water and let it come to temperature. About 120 degrees. Once it reached that point we took a small amount of it and let it cool. We then added the yeast to that and let it sit for about 10 minutes.

While the yeast sat, my cohort peeled and chopped apples. We began placing them in the carboy with the contents of one full vanilla bean and a dash or orange water (because it's period!)
Here it is! Ready to ferment and become alcoholic and delicious...

We then put the honey and water mixture in the carboy over the apples we already added. Once that was in, we added the pitch (yeast mixture). Once it was added we gave it a nice jostle to make sure everything was incorporated well.

Now a few notes: We probably should've pureed the apples or made them a lot smaller chunks. This make it easier for the yeast to digest and break down. It also takes up less volume in the carboy - therefore giving you more mead when it's done.

It's been sitting for a little over two weeks now! And it's bubbling away. In about two more weeks, we'll strain it into another carboy without apples, and let it sit for about 6 months!

Here's a short video of it bubbling away! This is what we're calling our "first born" until we taste it...
Once we start our next steps, I'll be sure to try and update. Leave comments below on your own experiences, and thoughts. This is very new, so any and all feedback is very very welcome. Thanks for reading!

Friday, September 18, 2015

An "Offal" Meal Indeed

Over this past weekend, I had the opportunity to visit with some friends in Maine. This just so happened to be the same friends that helped me run the dayboard for EKU. Since Neville and I obviously both share a fondness for food, as soon as we set a weekend we started planning a menu.

We came to the conclusion to go with something obscure. I like the opportunity to work with ingredients I don't normally use, and this time we did just that.

Neville was able to get some ham-hocks at the grocery store for a very reasonable price. We also had bacon to supplement and add bacon fat to the dish. Ham-hocks are a very tough meat, and to prep them we needed a few steps. First, we boiled them for about 20 minutes. Then we placed them in the oven with some spices for about 30-45 minutes. This gave the ham-hocks a much better texture and really made them easier to eat and enjoy.

Now, you might be asking... "What did you do with the ham-hocks?!". What any good medieval reenactor would do... I put it in a pie!! Of course, it was accompanied by some regularly used period ingredients - onions, carrots, peas, milk, and bacon!

We didn't just make the pie, though. I also threw in my favorite side dish from Libra de Cocina, Bacon and Leeks. I also used another recipe from the same book - Cheese Fritters. These three things together made for a very well rounded, delicious and very medieval feeling meal. I also made a few condiments for the table as well, although slightly less period - still delicious.

From left: Our ham hock pie, a spicy mustard, rice with leeks and bacon, tomato butter, bread, the last cheese fritter! (the other were eaten before I got the photo), and the second pie.
It was a full dinner for about 6 people, with some of the second pie leftover. I was very happy to cook for these great people, and would gladly do it again. I'm slowly learning more and more about period cooking and recipes and hope to continue to hone these skills. My next adventure will be mead! Definitely stay tuned for that if it's your thing... I'm thinking a vanilla bean and orange water combination - sort of a medieval creamsicle?

For now - enjoy my "Offal" Pie recipe!!

"Elvira's Offal Pie"

Feeds 6-8 (Makes 2 pies)

4 Ham hocks
1/4 lb of bacon - chopped
1 c peas
1 1/2 c carrots - diced
1 c onions - diced
1/4 c of cream
5 egg yolks - whisked
1 tsp thyme
1 tsp of pepper
Salt to taste (the pork should have enough salt - additional shouldn't be needed)

Preheat your oven to 350

Take your ham hocks and boil them in about 6 cups of water (as much as you need to cover the ham hocks) for about 30 minutes. KEEP THE WATER FROM THE HAM HOCKS! You can use it to cook rice in as a side dish if you so choose, but you'll need about 3 cups leftover to make the rue, and bake the ham hocks in.

Once they have boiled, place them in a shallow baking dish. Add 1-2 cups of water to the dish. Add seasonings to your taste. I used tarragon, thyme, sage, and bay leaves. Once you've added your spices, place the ham hocks in the over for 30 minutes.

While the ham hocks cook, place 1 cup of the leftover water in a saute pan. Let it come to a simmer and add your flour. I added a small amount of butter here as well, but it's not necessary. Once you have your desired consistency, add your onions.

If you're using pre-made pie crusts - take them out of the fridge if you haven't already. Otherwise they'll be hard to work with when it's time to fill them with this offal mixture (*snerk*).

Once the onions have cooked, add your bacon to the pan.

Once the bacon is almost fully cooked, add your carrots, and peas. By this point, you will need more liquid, so here's where you add that 1/4 c of cream.

Bring this all to a boil and let it simmer while you wait for the ham hocks to finish in the oven.

Once the ham hocks are done, chop the mean into bite sized pieces. We had about 3 cups worth once it was all cooked and chopped. Add the chopped ham hocks to the saute pan and cook for about 5 more minutes.

Lay your pie crusts out, in your pie pans. And then ladle in a few cups of the offal mixture. Pinch your crust around the filling, and fold over on any gaps. This makes for a pretty presentation. Once your pies are filled, pour the egg yolk mixture evenly over it. Bake this for 20 minutes at 425.

Once your oven can no longer contain it's excitement and dings at you, remove the pie from the oven and let it cool for about 5 minutes.

Then enjoy!!!


Thank you so much for reading, and please - comment below if you try this and let me know what you think!!!

Wednesday, September 16, 2015

My First Dayboard

So East Kingdom University was in April in Bangor, Maine. Awhile back I had decided to try my hand at preparing a dayboard for an event. I've always loved cooking, and as my persona that of an Osteria owner, I felt it only appropriate.

I was given the opportunity to prepare the meal for about 200 people. I wanted it to be warming, good, and as close to gluten free as possible, while still being period. I went with the basics. A pottage, a meat, fruit, cheese, and rice. All items are of course period, although the chicken thighs a more "high end" options for some during those times.
The line for dayboard. The hallway was short, but the line extended down the adjacent hallway.
The first item, was a pottage. Garlic, Onions, Potatoes, Carrots, Celery, and  Bacon. Boiled in salted water with pepper. The carrots did not end up as soft as I would have liked, but for later reference will pre-boil them to get the desired texture.

The rice was a brown rice, with garlic. Nothing fancy, but still apropos and yummy. There was also bread, with a garlic butter and an orange butter to offer. Very easy, but delicious.

The chicken was baked, and served cold. Rubbed with oil, and salt and pepper before cooking. Also went over quite well.


 The rest was simple fare. Sliced Cheese, Cottage Cheese with Sage and Thyme, "Scarborough Sauce" (a special sauce of mine that is secret weapon), sliced oranges and apples, strawberries, and pickles. Here is a photo that someone graciously took of their plate. 

Someone's perfect feast gear graciously decorated the dayboard. Top right is the pottage, and on the plate (clockwise from the right) chicken, strawberries, pickles, brown rice with garlic, apples, cottage cheese with herbs, carrots (from the pottage), and bread. 

It was my first attempt, and a successful one. However, there was no way I would have been able to pull this off without the help from my wonderful kinsmen. To Lord Neville and Lady Kathryn, I thank you. And to Lady Finnoula, my household, Lady Shyvan, Mama and Papa Longstrider, Sally, Aziz, and anyone else I may have missed (with my most sincere apologies) - None of this would have been possible without you. Your help and company made this a wonderful experience. I'm forever in your debt.

The hard work put into the dayboard was not unnoticed. At GNE this year, I was awarded with The Queen's Honor of Esteem for preparing the dayboard. I learned that a dear friend had written me in.


Unfortunately I wasn't present in court to receive it because I was...  cooking breakfast for my household. I have a favorite place when at an SCA event... and it's in a kitchen. Thanks again for reading! Stay tuned for more posts!